After you successfully install Smartsupp chat on your website, the first thing that you would probably want to do is to set up the appearance and functionality of the chat box.
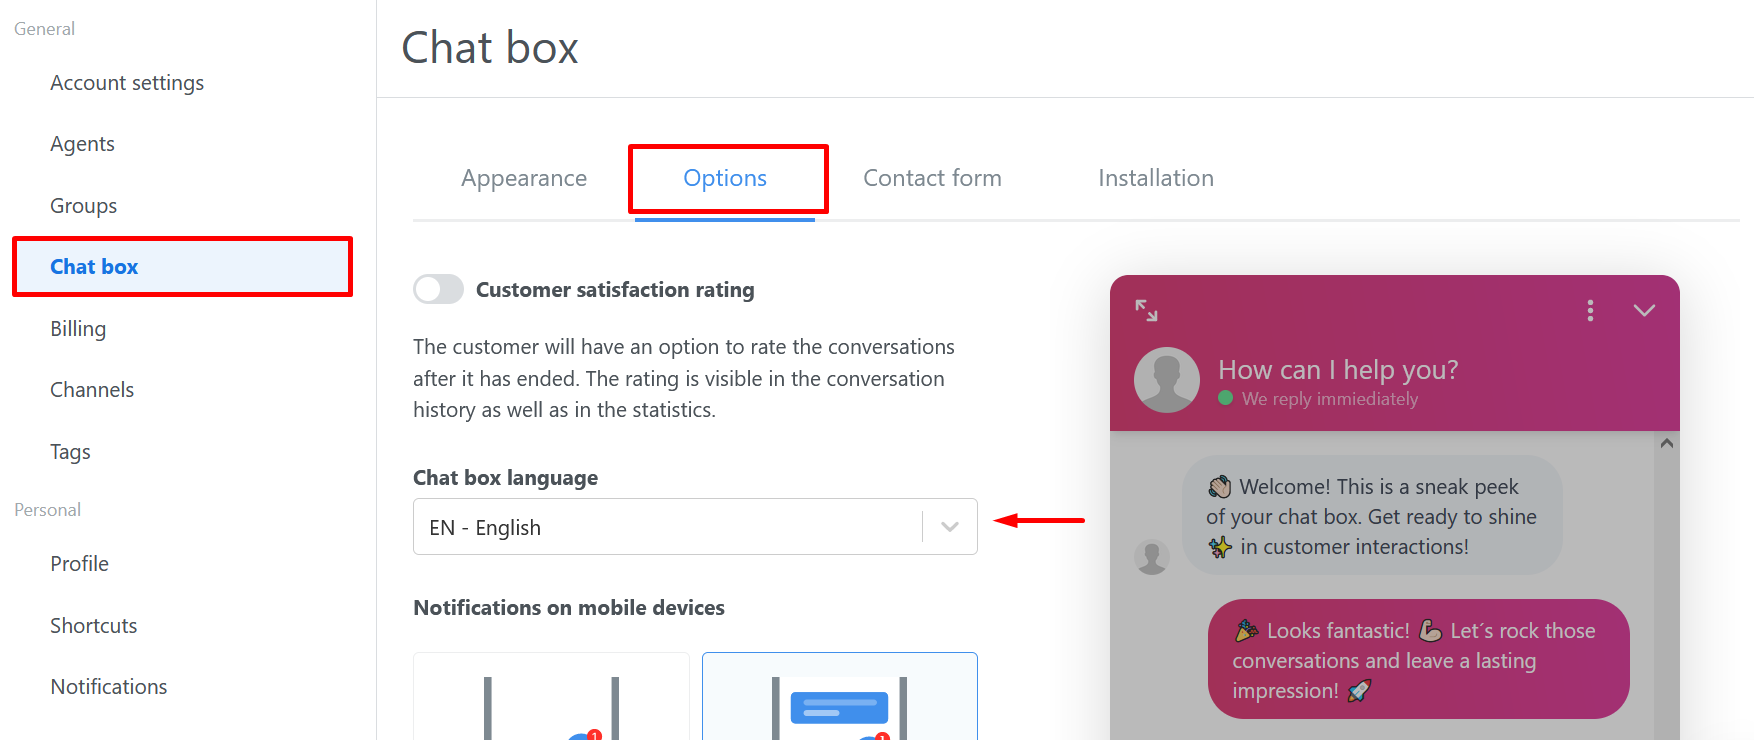
You will find the chat box options in Settings → Chat box
Chat box - Appearance
Note: It is possible to change the position of the chat box via API with the PRO package.
In chat box appearance settings you can change the color gradient (1) of the chat box as well as the chat box position (2), general texts (3), and theme (4), so it fits your website!
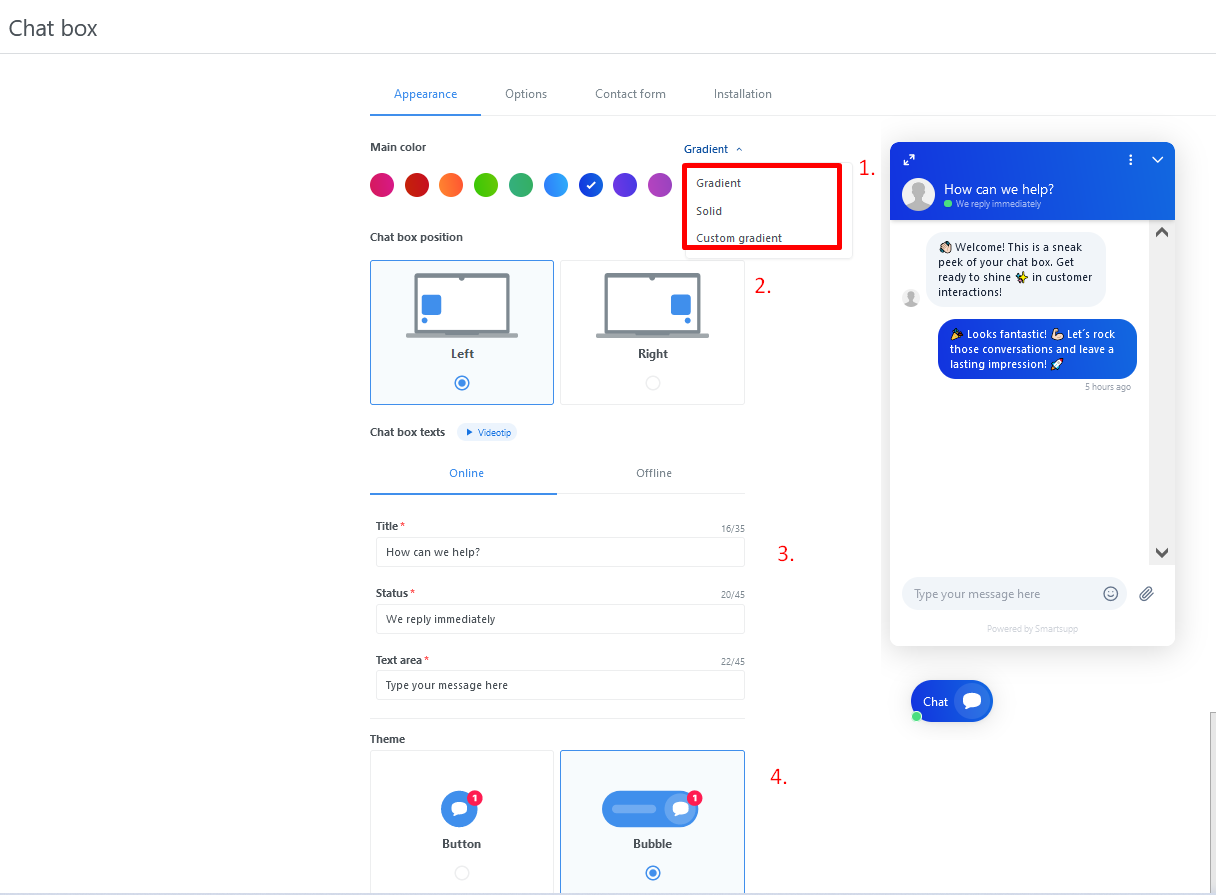
Note: There is a preview of how the chat box will look like after your changes, so you can always see what exactly you are changing.
Chat box - Options
Chat box option settings are divided into two categories - basic settings (1) and advanced settings (2).
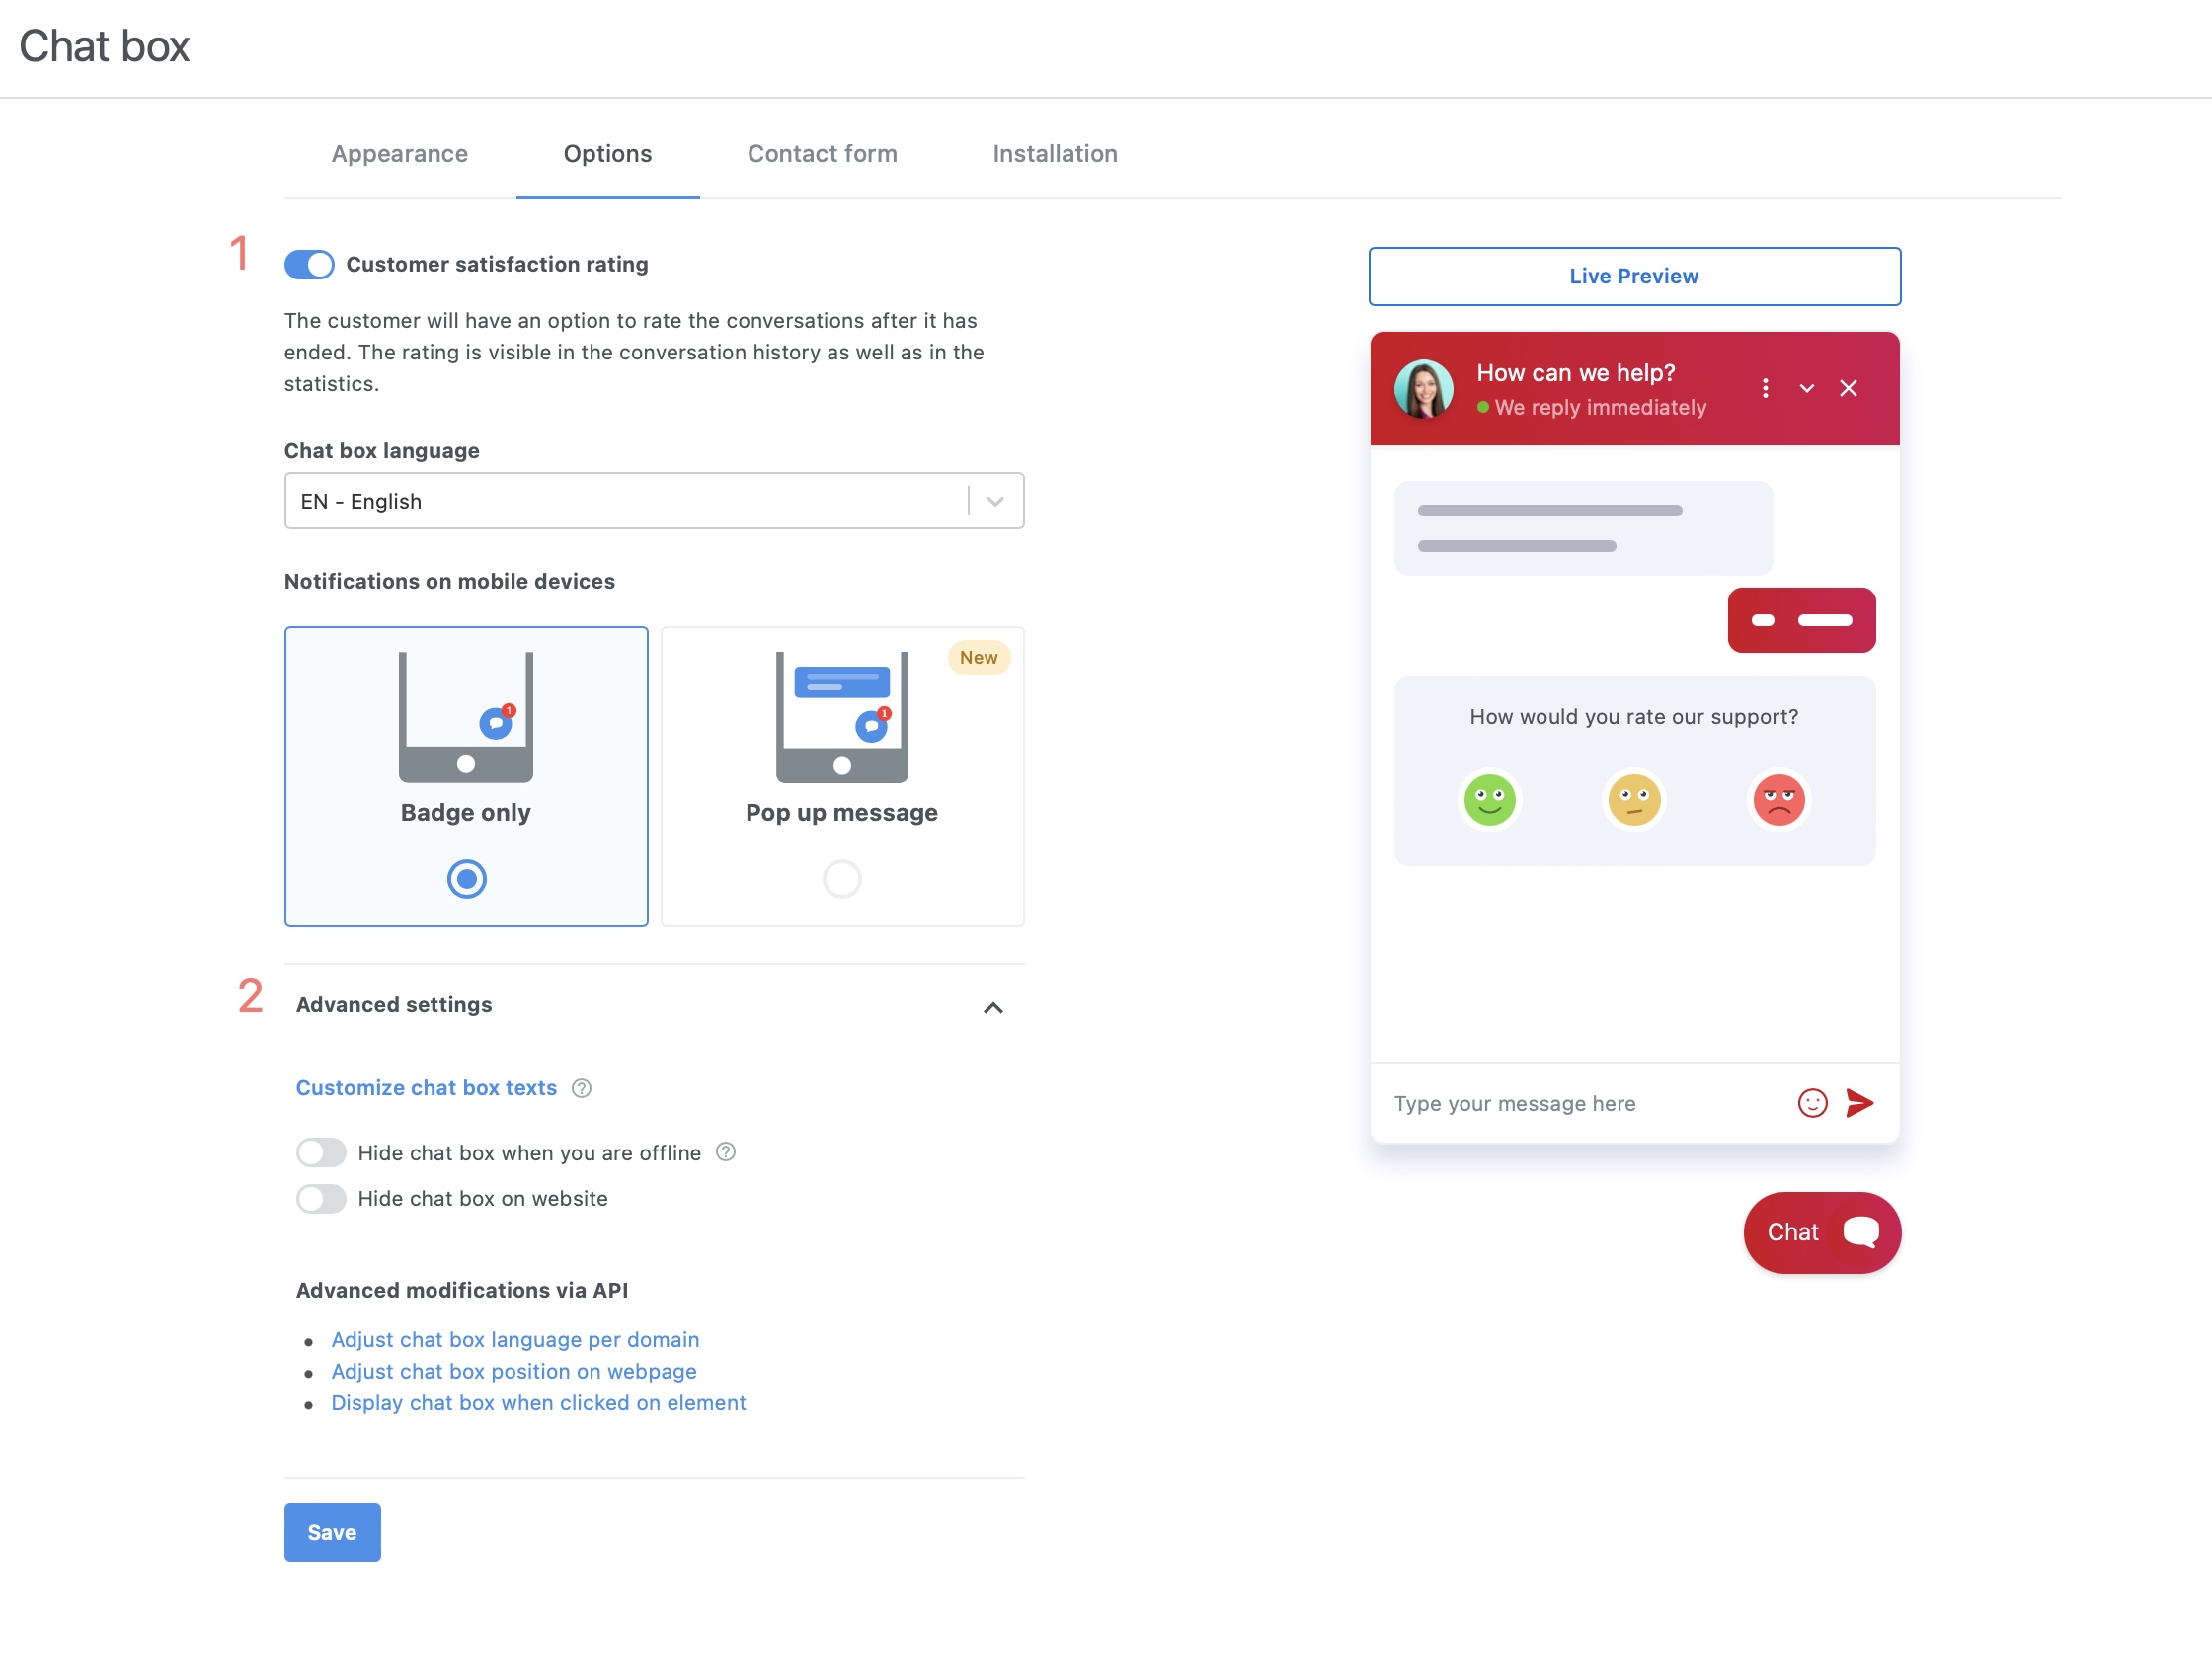
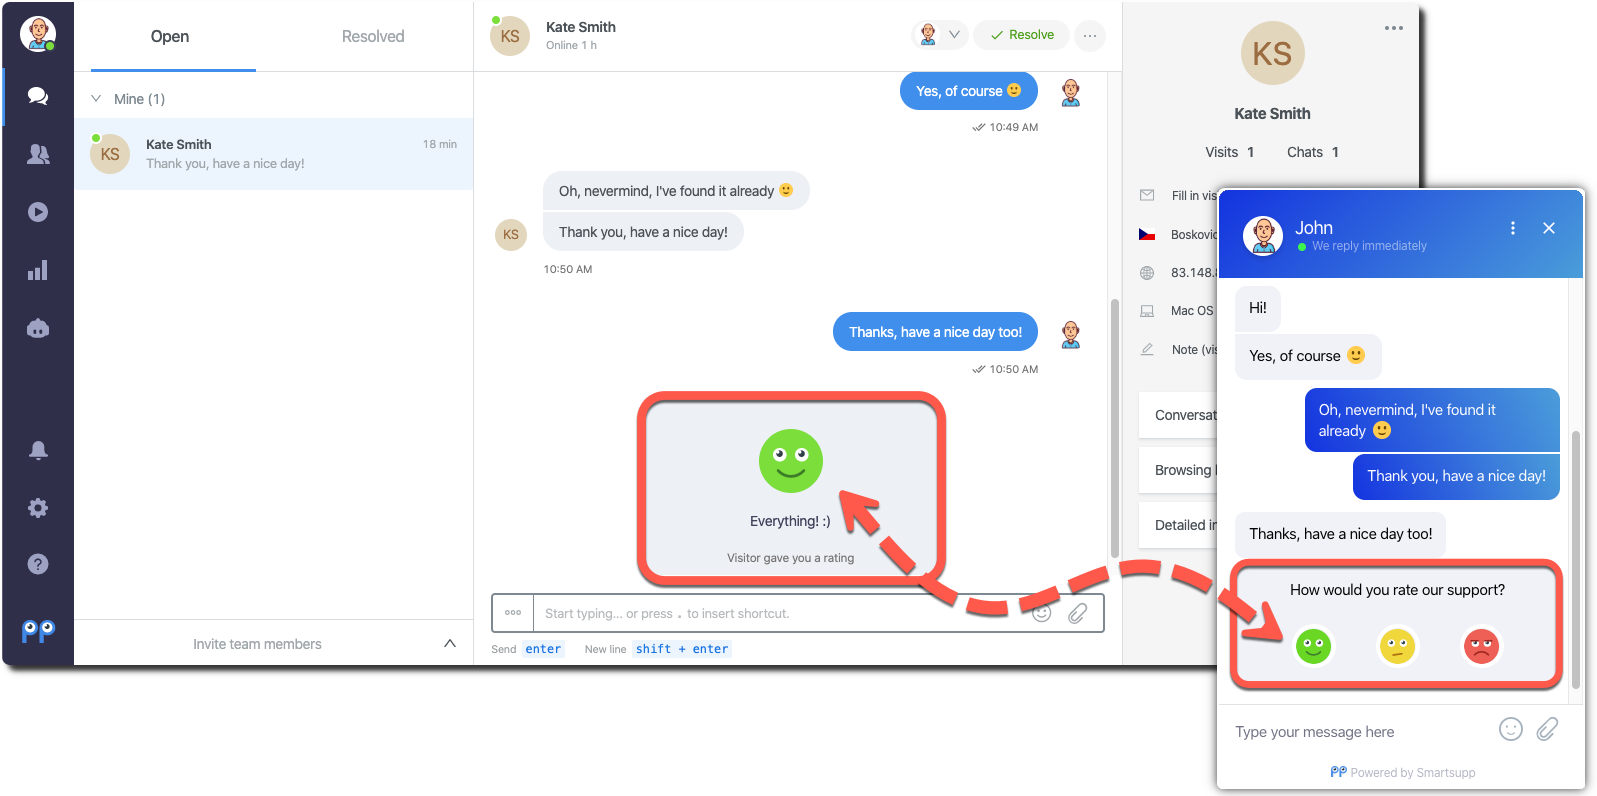
Customer satisfaction rating
This feature is only available in STANDARD and PRO package.
Turn on the agent rating, if you wish to know how well your agents are doing when communicating with visitors of your website. This feature is especially useful when you have multiple agents, and you want to continuously improve the quality of your customer support.
How to change chatbox language?
Smartsupp is translated into many languages! We recommend always using the same language of the Smartsupp chat box, as you are using on your website. After you change the language, the whole chat box is automatically translated.
To change chatbox language go to Settings >> Chat box >> Options and select one of 30 available languages.
Notifications on mobile devices
In order to increase the engagement of your customers via chatbot and automatic messages, you can choose, how the notifications of automatic messages or chatbot messages will look on the mobile devices.
If you want more customers to communicate with your chatbot or you really want to get a customer's attention for some special offer or a big sale, we recommend activating a pop-up message option. More engaged visitors mean more conversations and more chances to make a sale!

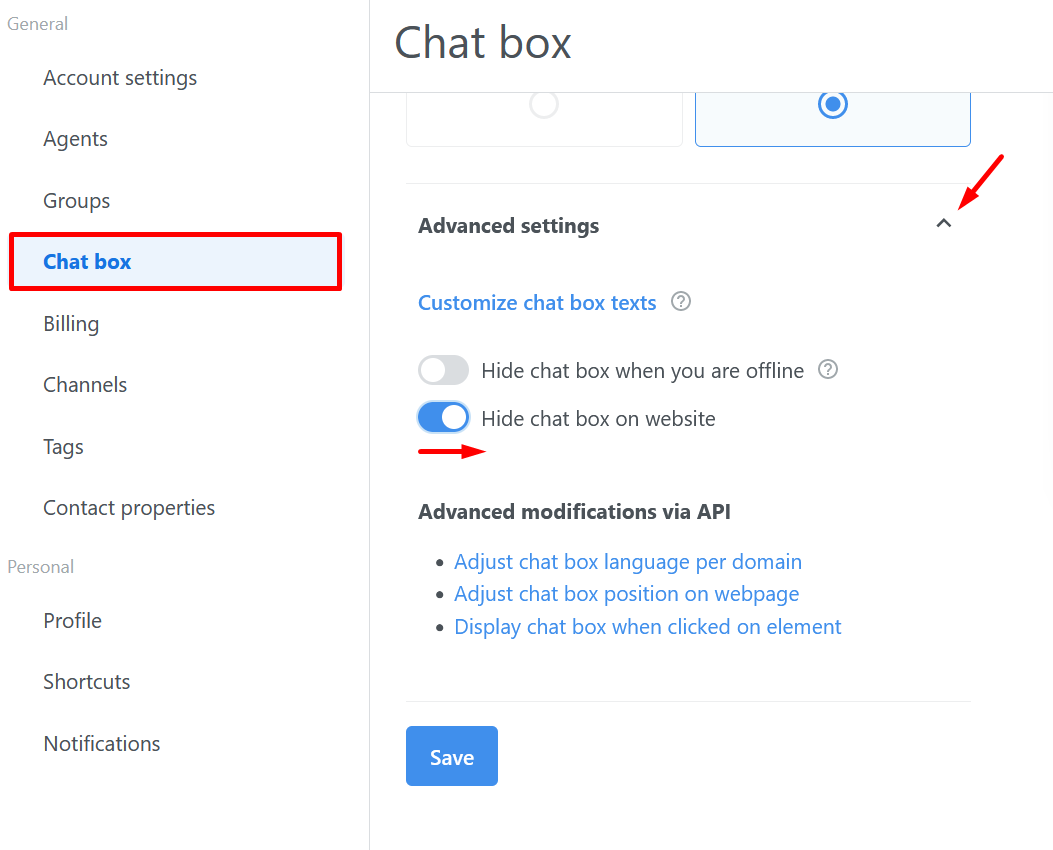
Customize chat box texts
If you want to change all or just some texts of the chat box and use your own words, you can simply do it in Chat box options → Advanced settings (1) → Customize chat box texts (2). Also, don't forget to save the changes after!
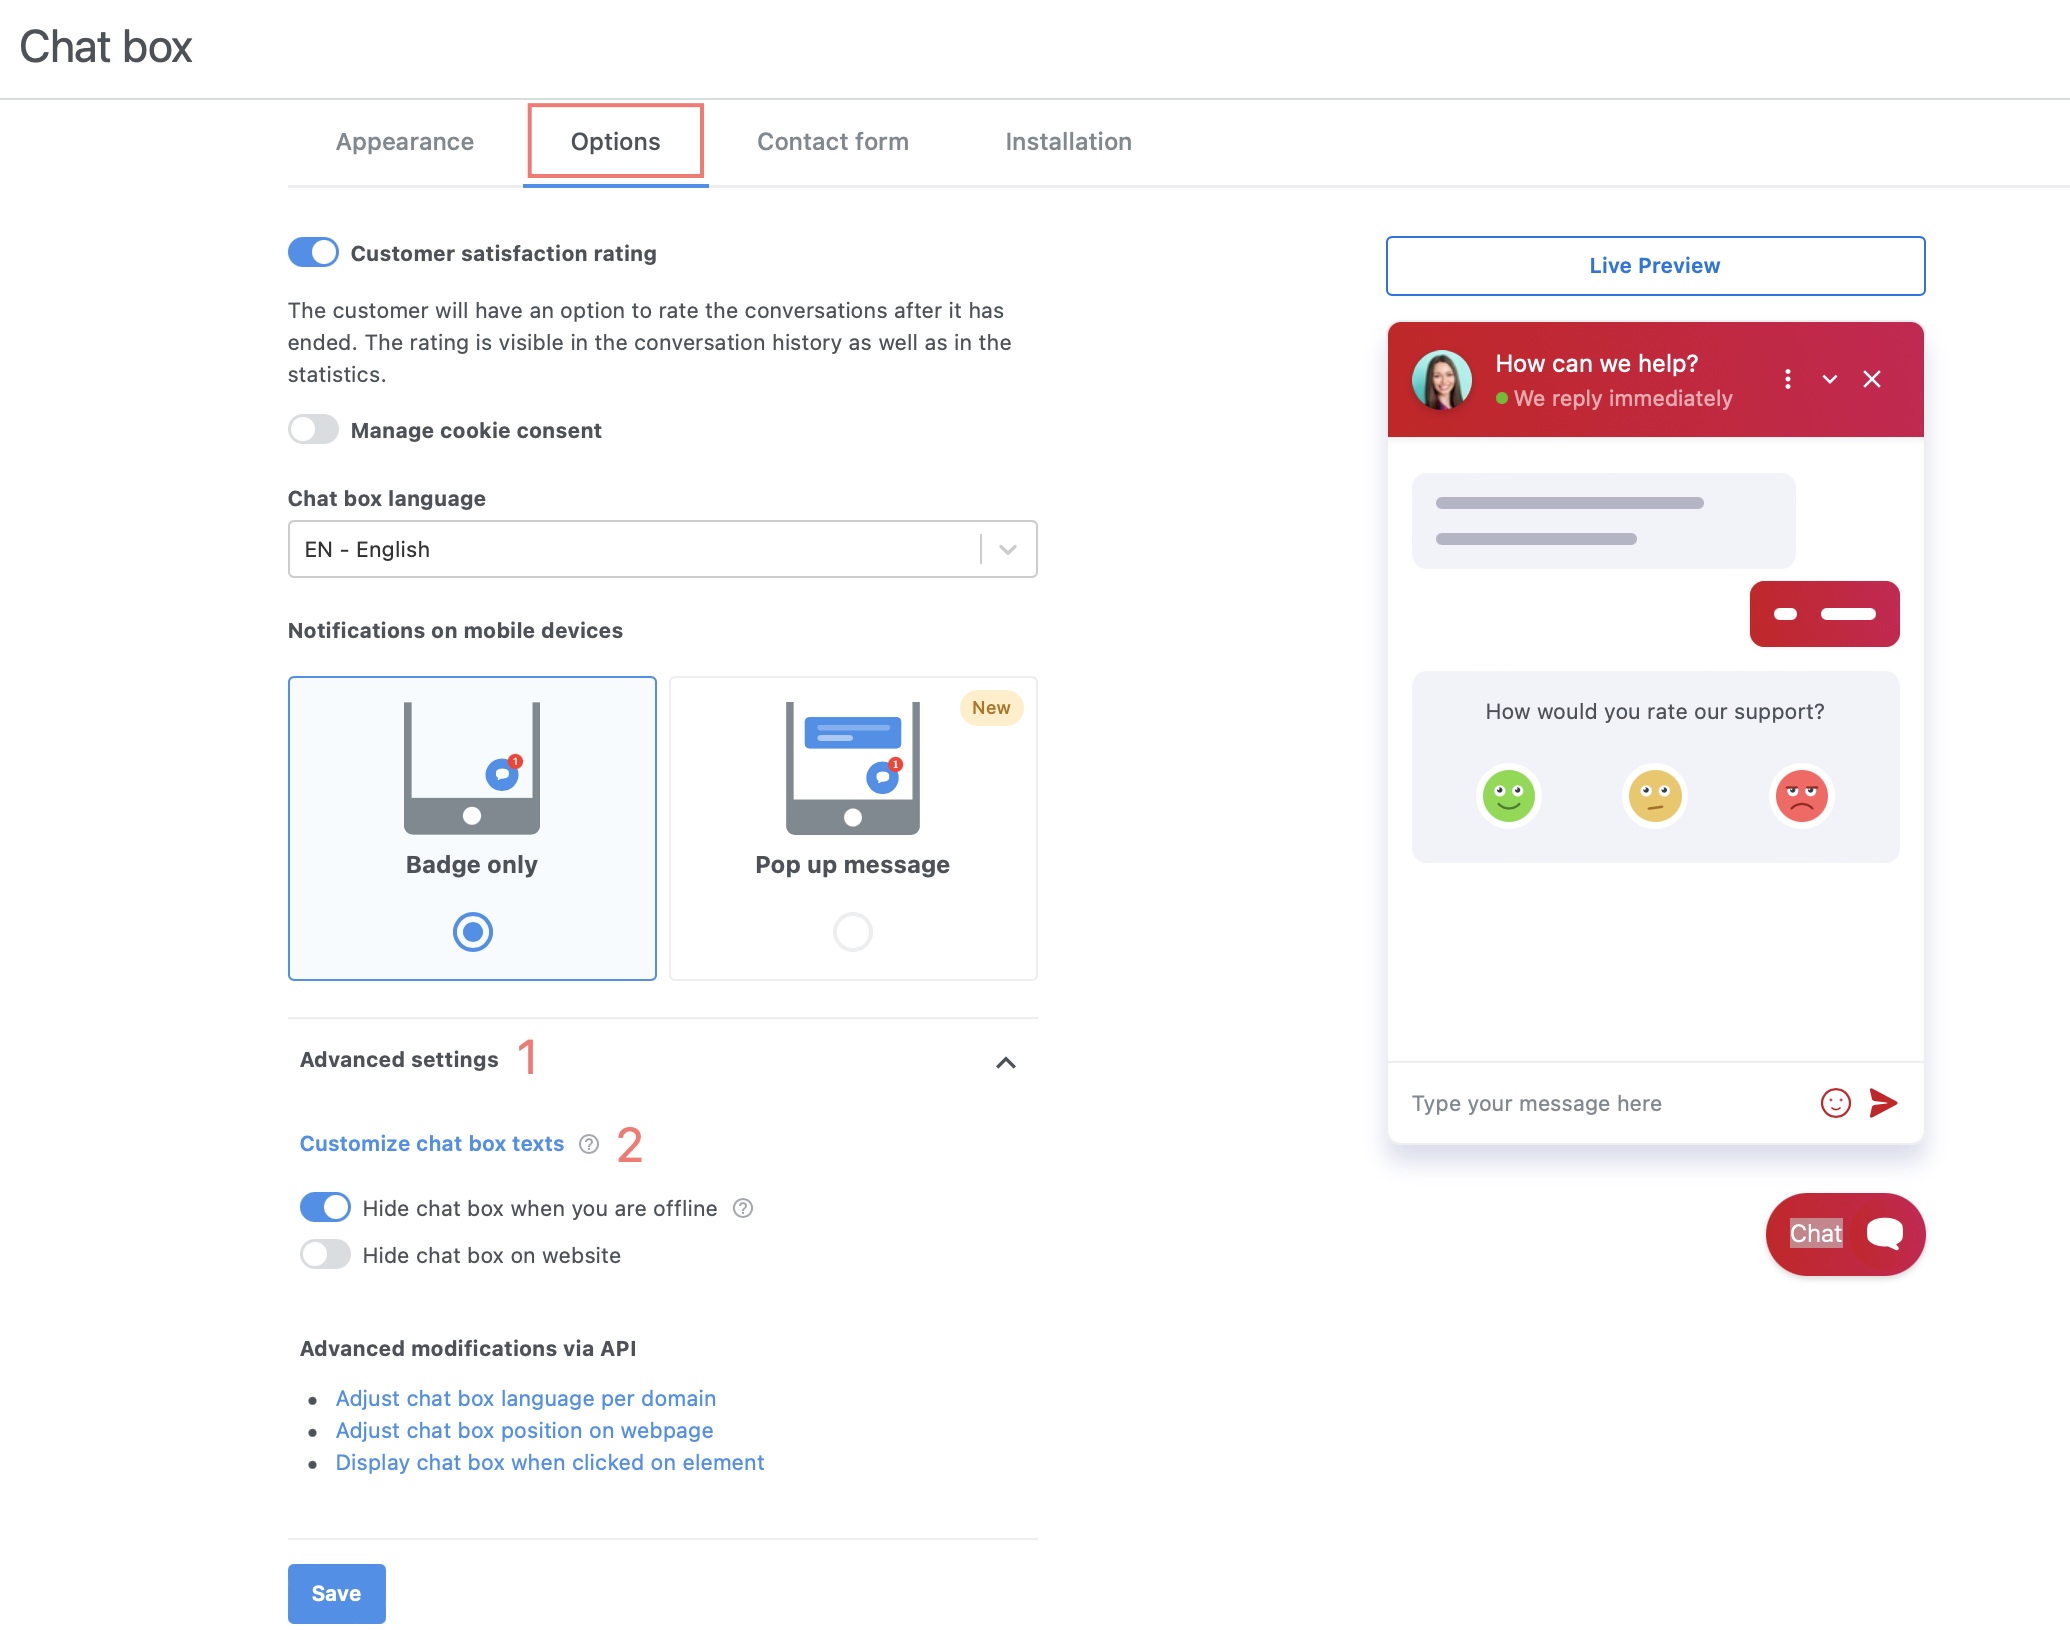
Hide chat box when you are offline
This feature is only available in STANDARD and PRO package.
You can use this option, in case you do not want the visitors to contact you when you are not online. The chat box on your website will remain hidden when there are no online agents in your account.
Go to Settings in your dashboard, then Chat box >> Options >> Advanced settings and change the position of the slider.
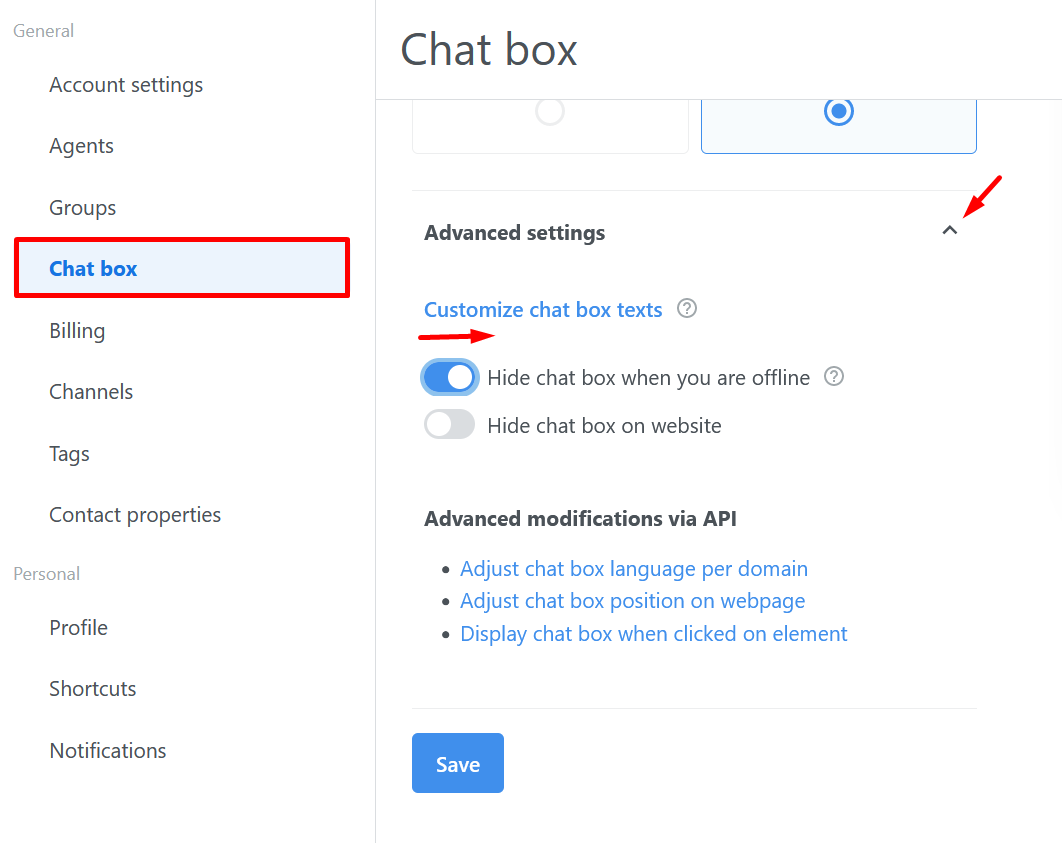
Hide chat box
This feature is only available in STANDARD and PRO package.
Is your website in development, or are you just currently too busy to provide chat support? No problem! Use this option and hide the chat box from your website until you are ready to answer your visitors’ questions.
Go to Settings in your dashboard, then Chat box >> Options >> Advanced settings and change the position of the slider.
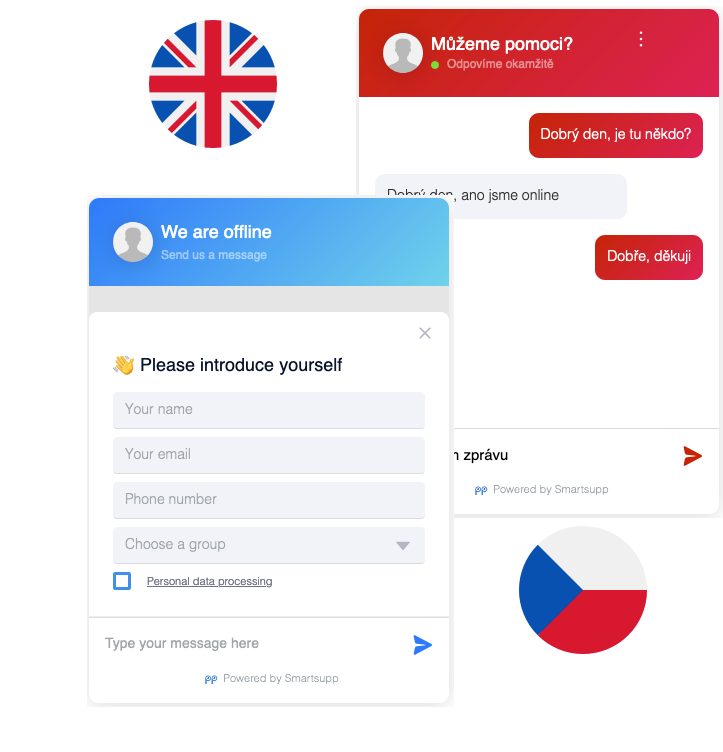
Contact form
This feature is only available in STANDARD and PRO package.
This form is always automatically displayed when you are offline. It requires visitor contact information so you can later reply to their message. To be able to gather your visitor's contact information also while you're online, it is necessary to enable the Contact form also when you're online. If you want to find out more about the Contact form, check out our tutorial.
